How To Get Studio Quality Recording At Home
In this post on how to get studio quality recording at home we will dive into the essentials to getting quality recordings at home. In today’s digital age, the dream of creating professional-grade recordings from the confines of your own home has become more attainable than ever before.
With the right equipment, techniques, and mindset, you can achieve studio-quality results without breaking the bank or leaving your house. In this guide, on how to get studio quality recording at home, we’ll delve into the key aspects of home recording, covering everything from setting up your space to mastering your final tracks. With the right techniques and dedication, you can transform any space into a studio capable of capturing pristine audio and achieving that polished sound you’ve always desired.
Gone are the days when achieving studio-quality recordings necessitated expensive studio time and a team of seasoned engineers. Now, with the advent of affordable recording equipment and the abundance of online resources, aspiring musicians, podcasters, and voice-over artists have the tools at their disposal to rival even the most prestigious recording studios.
Whether you’re a seasoned producer looking to enhance your home setup or a newcomer eager to embark on your recording journey, this guide will serve as your roadmap to achieving home studio recording quality right from the comfort of your own home. So, roll up your sleeves, unleash your creativity, and let’s dive into the world of how to get studio quality recording at home!
Setting Up Your Home Studio
- Choosing the Right Space: Select a room with good acoustics, minimal background noise, and enough space to accommodate your equipment.
- Acoustic Treatment: Invest in acoustic panels, bass traps, and diffusers to control reflections and improve sound quality.
- Ergonomics: Arrange your equipment in an ergonomic layout to optimize workflow and comfort during long recording sessions.
Setting up your home studio is an exciting and pivotal step towards achieving professional-quality recordings without ever having to leave the comfort of your own space. From selecting the right equipment to optimizing your environment for pristine sound capture, every aspect plays a crucial role in the success of your home recording endeavors. How to get studio quality recording at home will come down mostly to your taste and your desired outcome
Choosing the right space for a home studio is paramount o how to get studio quality recording at home and achieving professional-quality audio recordings. Whether you’re a musician, pod caster, or content creator, the environment in which you record significantly impacts the final product. Here are some essential factors to consider when selecting the perfect room for your home studio
Acoustics: Opt for a room with favorable acoustics. Ideally, you want a space with minimal echo and reverberation, as these can muddy your recordings. Rooms with hardwood floors, bare walls, and high ceilings tend to create more echo, whereas carpeted floors, upholstered furniture, and textured walls can help absorb sound, resulting in clearer recordings. Experimenting with acoustic treatments like rock wool panels or diffusers can further optimize the acoustics of your space. Please e aware that investing in acoustic treatment will have the biggest impact on the quality of your recording, mixing ad mastering.
Size: The size of the room can impact the sound quality of your recordings. Larger rooms generally have more natural reverb, which might be suitable for certain types of music but can be challenging to control. Conversely, smaller rooms can feel more intimate and provide tighter sound control.
Consider the type of audio you’ll be recording and choose a room size that complements your needs. In general consider what you will be done in the room. If the room is for mixing the dimensions of the room will be different form say a room for mastering. The size of the room will come down to the use of the room. Will have to further research to ensure that you select the right size room.
Background Noise: Select a room with minimal background noise to ensure clean recordings. Avoid spaces near busy streets, HVAC systems, or other sources of constant noise. Pay attention to ambient noises like fans, refrigerators, or air conditioning units, as these can interfere with your recordings, especially when using sensitive microphones. If possible, soundproof the room by sealing windows, adding weather stripping to doors, and using soundproofing materials to minimize external noise.
Accessibility: Choose a room that is easily accessible and convenient to use as a studio. You’ll want a space where you can set up your equipment and leave it undisturbed between recording sessions. Consider proximity to power outlets for plugging in equipment and access to the internet if you’ll be live streaming or collaborating online.
Flexibility: Keep in mind the versatility of the space. Ideally, your home studio should be adaptable to accommodate different recording setups and projects. Look for a room that offers flexibility in terms of layout and can easily be customized to meet your changing needs.
Inspiration: Lastly, consider the vibe and atmosphere of the room. Your creative environment plays a significant role in your workflow and productivity. Choose a space that inspires you and makes you feel comfortable and creative. Personalize the room with decor, lighting, and other elements that reflect your aesthetic and enhance your creative process.
how to get studio quality recording at home is carefully considering these factors and selecting a room with good acoustics, minimal background noise, and the right ambiance, you can create a home studio that fosters creativity and produces professional-quality audio recordings.
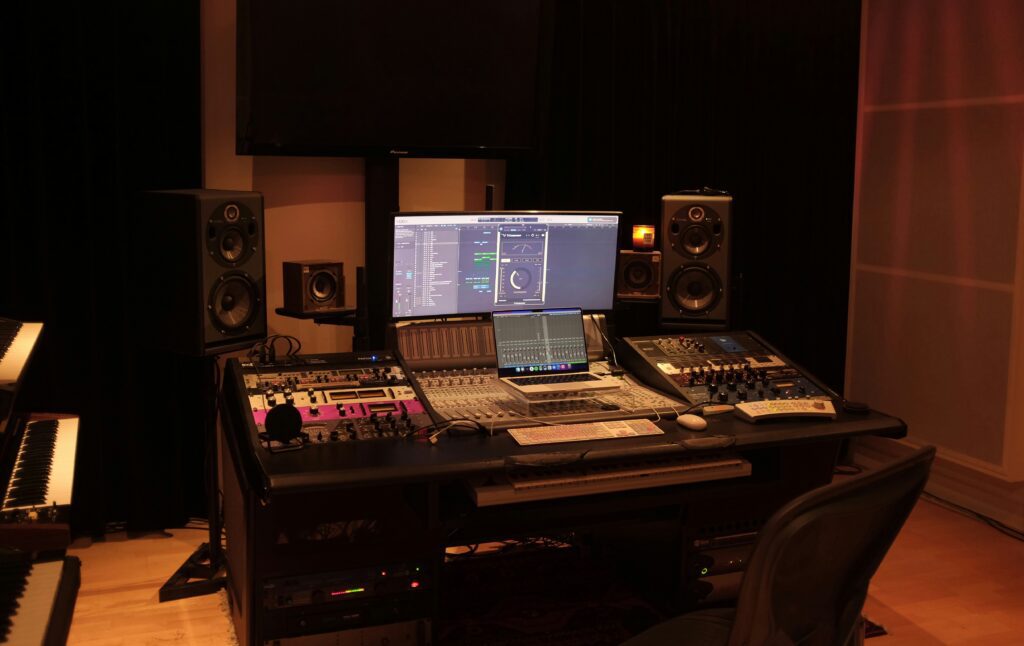
Essential Equipment
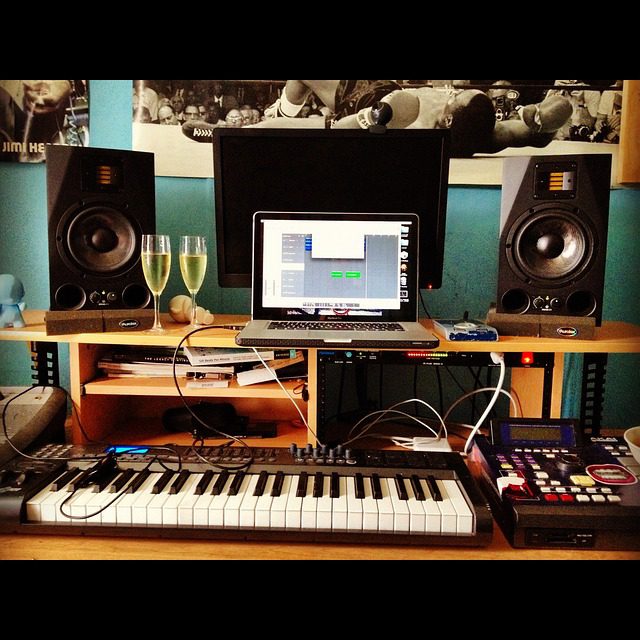
Creating a functional home recording studio requires essential equipment tailored to your specific needs. While the exact setup may vary depending on your recording goals and budget, certain pieces of equipment are fundamental for achieving professional-quality audio productions. The essentials:
- Computer
- Audio Interface
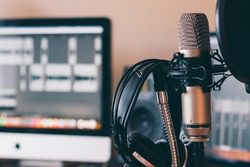
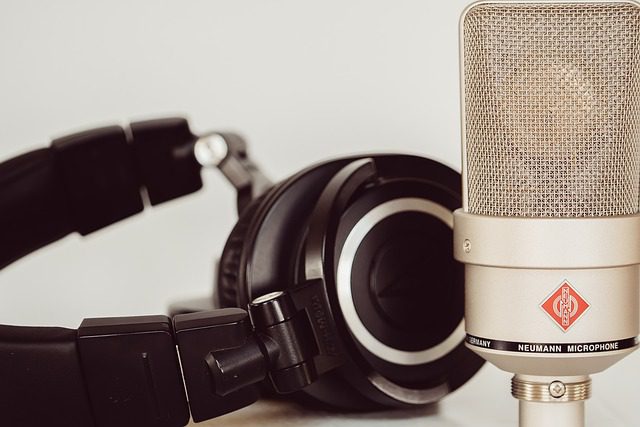
- Microphones
- Studio Monitor
- Headphones
- Accessories
First and foremost, invest in a reliable computer or laptop with sufficient processing power and storage capacity to handle audio recording, editing, and mixing software. Digital Audio Workstations (DAWs) such as Pro Tools, Logic Pro, or Ableton Live are indispensable tools for recording and producing music, podcasts, or other audio content.
The cornerstone of any home studio is a reliable computer or laptop capable of handling the demands of modern recording software. Whether you’re a Mac aficionado or a PC purist, ensure that your system boasts sufficient processing power, ample RAM, and ample storage to accommodate your recording projects.
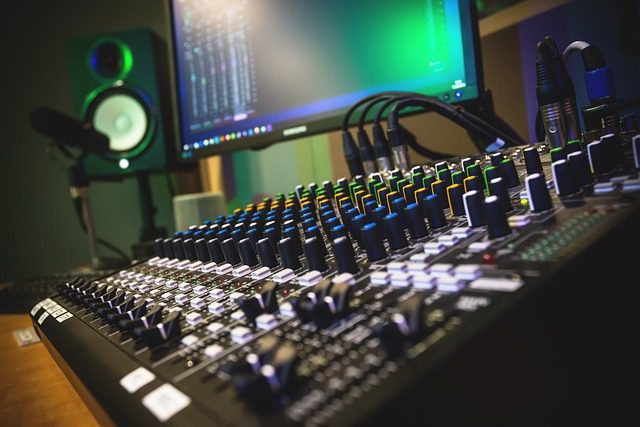
A high-quality audio interface serves as the bridge between your instruments, microphones, and computer, converting analog audio signals into digital data for processing. Choose an interface with the appropriate number of inputs and outputs to accommodate your recording setup. If you want to record more than one instrument at a time consider getting an interface with as many inputs and outputs as required.

Microphones are essential for capturing sound, and having a selection of microphones suited for different purposes is advantageous. A versatile large-diaphragm condenser microphone is ideal for capturing vocals and acoustic instruments, while dynamic microphones are suitable for louder sound sources like electric guitars or drums.
Studio monitors or headphones are crucial for accurate sound monitoring and mixing. Invest in a pair of flat-response studio monitors or headphones to ensure an accurate representation of your recordings without coloration. Selecting the right monitor or headphone is crucial. If your monitoring is off in anyway this will be reflected in the final product. Choosing the right setup will take sometime, you will need to test and experiment a lot to make the right choice. You need to go to as many music stores and test as many studio monitors ad headphones as possible.
Lastly, consider accessories such as microphone stands, pop filters, and acoustic treatment to optimize your recording environment and enhance the quality of your recordings. With these essential pieces of equipment, you can set up a home recording studio capable of producing professional-grade audio content.
Recording Techniques
Mic Placement: Proper microphone placement is crucial for capturing the best sound possible. Experiment with different positions relative to the sound source to find the optimal balance between clarity and warmth. For vocals, try positioning the microphone slightly off-center to reduce plosives and sibilance or use a pop filter. For instruments, consider the instrument’s tonal characteristics and experiment with placement to capture the desired sound. Every recording space is unique, so experimentation is key to finding the best mic placement for your specific setup. Try different positions and angles to determine what captures the sound you desire.
Distance: The distance between the microphone and the sound source greatly affects the recording. For close-miking, place the microphone relatively close to the sound source to capture a direct, intimate sound with minimal room ambiance. For ambient recordings, move the microphone further away to capture more room sound and natural reverb. For example if your to record a vocal with a desire for a intimate sound it would be a great idea to position the vocalist closer to the microphone.
Directionality: Consider the polar pattern of your microphone and position it accordingly. Cardioid mics are most sensitive to sound from the front and reject sound from the rear, making them ideal for isolating a single sound source. Omni-directional mics capture sound from all directions, while figure-eight mics pick up sound from the front and back but reject sound from the sides.
Off-axis Placement: Experiment with off-axis mic placement to achieve different tonal characteristics. Rotating the microphone slightly off-axis can help reduce harshness or sibilance in vocal recordings while still capturing the desired sound.
Room Acoustics: Pay attention to the acoustics of your recording space. Minimize reflections and reverberations by adding acoustic treatment such as bass traps, diffusers, and acoustic panels. Experiment with microphone placement and room positioning to find the sweet spot that minimizes unwanted room sound while capturing the desired sound source.
Gain Staging: Proper gain staging ensures optimal signal-to-noise ratio and prevents clipping or distortion. Set appropriate levels at each stage of the signal chain, from the microphone preamp to the recording software. Aim for a healthy signal level without pushing the gain too high, which can introduce unwanted noise.
Monitoring: While adjusting mic placement, use headphones or studio monitors to monitor the sound in real-time. Listen for any unwanted artifacts or imbalances and make adjustments as needed.
Invest in quality studio monitors or headphones for accurate monitoring during recording sessions. Use headphones for tracking individual instruments or vocals and switch to studio monitors for mixing and critical listening. Pay attention to the frequency response of your monitors and familiarize yourself with how your mixes translate to different playback systems.
Performance: A great recording starts with a great performance. Encourage musicians to deliver their best performances by creating a comfortable and inspiring environment in your home studio. Provide clear direction and constructive feedback to help them achieve their artistic vision.
In conclusion, mastering recording techniques is essential for how to get studio quality recording at home. By paying attention to mic placement, room acoustics, gain staging, monitoring, and performance, you can elevate your recordings to the next level and unleash your creative potential. Experimentation and practice are key, so don’t be afraid to try new techniques and refine your skills over time. With dedication and attention to detail, you can create studio-quality recordings right from the comfort of your own home.
Editing and Mixing
Editing and mixing are crucial stages in the production process of any audio recording, whether it’s music, podcasts, or voiceovers, and they play a significant role in shaping the final sound. In a home recording studio setup, mastering these skills is essential for how to get studio quality recording at home without the luxury of a dedicated team. These are points to consider:
- Editing: Use editing tools in your DAW to clean up performances, fix timing issues, and remove unwanted noise or artifacts.
- Mixing: Learn the basics of mixing, including balancing levels, panning, EQ, compression, and reverb, to create a polished and cohesive sound.
- Reference Tracks: Compare your mixes to professional recordings in similar genres to ensure they meet industry standards.
- Collaboration: Consider collaborating with other musicians, producers, or engineers to gain new perspectives and improve your skills.

Editing involves refining the raw audio recordings to correct mistakes, remove unwanted noise, and ensure seamless transitions between sections. This process typically includes tasks such as trimming audio clips, aligning tracks to a grid for rhythmic accuracy, and removing pops, clicks, or background noise using tools like noise gates or audio restoration plugins. Paying attention to detail during editing can greatly enhance the overall polish and professionalism of your recordings. And this step is vital on how to get studio quality recording at home
Once the audio has been edited, it’s time for mixing, where individual tracks are blended together to create a balanced and cohesive sound. Mixing involves adjusting levels, panning, and applying audio effects such as EQ, compression, reverb, and delay to sculpt the sound and create depth and dimension. With a careful ear and attention to sonic detail, you can create a mix that highlights the strengths of each element while minimizing distractions and inconsistencies.
In a home recording studio environment, it’s essential to work methodically and efficiently during the editing and mixing process. Organize your session by grouping similar tracks together and labeling them clearly for easy navigation. Use reference tracks from professional recordings to help guide your decisions regarding levels, tonal balance, and overall sonic quality. Additionally, invest in quality monitoring equipment such as studio monitors or headphones to ensure accurate playback and make informed mixing decisions.
With practice and patience, honing your editing and mixing skills in a home recording studio can yield professional-grade results that rival those of commercial productions. Embrace the creative possibilities that these stages offer and enjoy the journey of crafting polished and compelling audio recordings from the comfort of your own home. Take breaks periodically to give your ears a rest and maintain objectivity when evaluating your mix.
Mastering
Audio mastering is the final stage in the music production process, where the final mix is polished to achieve a cohesive and professional sound. While mastering is traditionally done in specialized mastering studios, advancements in technology have made it possible to perform mastering tasks within the confines of a home studio. Here are some essential aspects to consider when mastering audio in a home studio environment:
Room Acoustics: Just like with recording and mixing, room acoustics play a crucial role in mastering. Ideally, your mastering space should be acoustically treated to minimize unwanted reflections and provide an accurate listening environment. Invest in acoustic treatment such as bass traps, diffusers, and acoustic panels to tame room resonances and ensure that you’re hearing an accurate representation of your mix.
Monitoring: Accurate monitoring is essential for effective mastering. Invest in high-quality studio monitors or headphones with a flat frequency response to ensure that you’re hearing your mix accurately. Familiarize yourself with your monitoring setup and how your mixes translate to different playback systems to make informed mastering decisions.
Reference Tracks: Utilize reference tracks from commercially released songs in a similar genre to your own. A/B comparing your mix to professionally mastered tracks can provide valuable insight into areas where your mix may need improvement. Pay attention to aspects such as overall tonal balance, dynamics, and stereo imaging, and strive to match the quality and clarity of your reference tracks.
Mastering Plugins: While traditional mastering hardware can be expensive, there are now many software plugins available that emulate classic mastering processors. Invest in a quality mastering plugin suite that includes EQ, compression, limiting, and other essential tools. Experiment with different settings and plugin chains to achieve the desired balance of clarity, punch, and loudness in your master.
Subtle Enhancements: Mastering is about making subtle enhancements to the mix to bring out its full potential. Use EQ to balance the frequency spectrum, compression to control dynamics, and stereo imaging tools to enhance the width and depth of the mix. Be mindful not to over-process your master, as subtle adjustments often yield the best results.
In conclusion, mastering audio in a home studio requires attention to detail, proper monitoring, and a good understanding of mastering techniques. By investing in quality equipment, familiarizing yourself with mastering principles, and honing your skills through practice, you can achieve professional-quality masters right from the comfort of your own home. And with this how to get studio quality recording at home post its time to implement what you have learned here.
How To Get Studio Quality Recording At Home Conclusion
In conclusion, how to get studio-quality recording at home comes down to the quality of your equipment and the room/space you choose. setting up your home studio is a rewarding endeavor that requires careful consideration of equipment, environment, and technique. Investing in quality gear, optimizing your space, and honing your recording skills, you can transform any room into a sanctuary of creativity and sonic excellence. So, roll up your sleeves, unleash your imagination, and let the recording magic begin!
Continual Learning and Improvement:
- Practice: Dedicate time to practicing recording, editing, mixing, and mastering techniques to hone your skills and develop your own unique sound.
- Education: Take advantage of online tutorials, courses, and communities to learn from experienced professionals and stay updated on industry trends.
- Feedback: Seek feedback from peers, mentors, and listeners to identify areas for improvement and refine your craft over time.